 The best way for juniors to learn new skills is to have them perform golf practice drills that are fun and challenging for them to do to improve. Anybody involved in junior sport knows that children love to be involved and take part in "games" that are not necessarily competitive, but give the child a sense of accomplishment when they can complete the drill or exercise. The drills that are easy to set up and use along with practical training aids that are easy to bring along with you to the driving range or golf course are the best. These drills are designed mostly around the short game so they can be done by juniors from the age of 7 years and older, as physical strength is not a prerequisite. But remember that good fundamental technique is required to complete the drills. 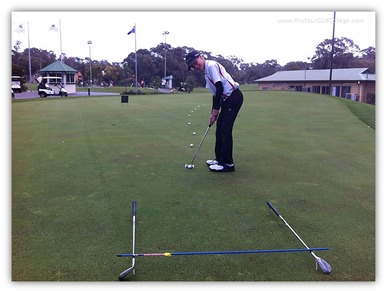 Putting (Speed Control Drill) Most juniors starting out have not developed speed control so the earlier you can introduce the importance of "speed being the king" and the line of the putt coming second the better. Place two tee's into the green 3 feet apart and another two tee's 3 feet behind them. Take two clubs preferably wedges and place the grips on the front tee's and the club heads on the back tee's as pictured (left). This forms a suspended target and you can finish it off by placing an alignment stick at the back end. Take 10 balls and starting from a 3 feet distance out, place a ball at 3 feet intervals (3, 6, 9, 12, 15, 18, 21, 24, 27, 30). The objective of this drill is to putt as many of the ten balls into the 3 feet square target. Keep a record of the best result so there's always a record to beat the next time the drill is done. Pick a flat part of the putting green to start with and move on to breaking putts after the junior is averaging more than 70% consistently on the flat putts. 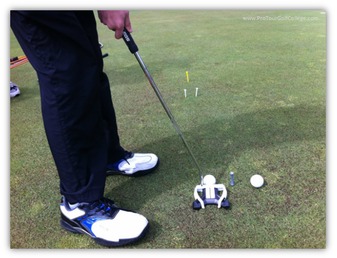 Putting (Speed and Line Drill) Find a flat spot on the putting green, place a ball on the green and two tee's each side of the ball slightly wider than the ball. Place another tee a putter grip length behind the two tee's. To finish the set up use the length of putter to measure and place another tee as the starting point of the drill as in picture. Now using two golf balls start at the putter length tee and the objective is to putt two balls in a row through the tee's and stop the ball before the grip length tee at the back. Once the junior has achieved this, move the putter length tee to two putter lengths away and repeat the drill. Set a time limit of 15 minutes and see how many putter lengths the junior finishes from the target. 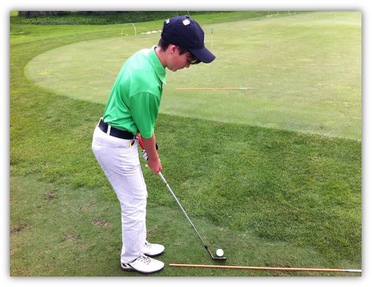 Chipping (Contact and Landing Spot Drill) When a junior can learn to contact a chip correctly it will also help to improve their contact with the full iron shots as well. So they are never too young to learn how to achieve good impact conditions. For this drill two alignment sticks are required. First place an alignment stick 4 inches behind the ball with the second stick on the green where you want the ball to land as pictured. The first objective is to not hit the stick behind the ball which will encourage a slightly descending strike. The second objective is to land the ball just before the stick on the green and "leap frog" it, allowing the ball to run out to the hole. Adjust the stick on the green if it's not in the right position, and change the loft of club if needed. This drill teaches solid contact and gives good visual feed back on the trajectory and roll of the ball with different clubs. 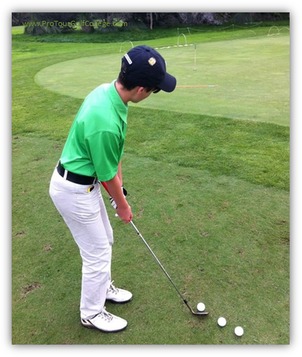 Pitching (Edge of Green Drill) For this drill place an alignment stick 6 feet onto the green. Measure and place markers at 10,15, 20 and 25 yards with the objective to hit 5 shots from each distance for a total of 20 shots and measure how many of your shots hit the green in the zone. This drill helps you to develop good distance control from the different distances which is crucial as most juniors at this stage don't hit greens in regulation and so building a solid scrambling game will be an advantage. 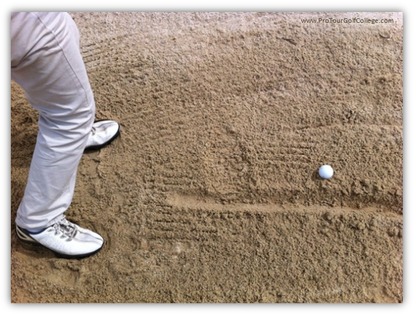 Bunker (Trench Drill) This is such a simple yet effective drill to teach juniors, or in fact any golfer how to make good contact on a basic bunker shot. Place a ball in the bunker and dig a trench behind the ball with your club head. Next remove the ball and get the junior to set up with the trench opposite the center of their stance and ask them to strike the target side of the trench as shown in the picture and blast the sand outside the bunker. It is important that the sand to the right of the trench is not touched when doing this drill. When the junior can displace the sand on the target side of the trench 7 out of 10 times place a ball just left of the trench. Now repeating the same swing striking the target side of the trench with the goal of making the sand land outside the bunker which will see the ball fly softly out and onto the green. These are just a few of the drills that you can introduce to your child, or the junior that you are coaching. It is helpful to remember to allow them to learn the skills themselves. Show them how, and then let them learn their way. Be reminded that the more you can create a fun learning environment - rather than a teaching environment, the quicker they will learn the new skills and have fun whilst they do it. David Milne and Lawrie Montague - Pro Tour Golf College Your Success On Tour is Our Business Comments are closed.
|
Archives
June 2019
|
Proudly Supported By
Copyright © 2011 - 2018 Pro Tour Golf College
Website Managed By Golf Performance Media
All Rights Reserved
Website Managed By Golf Performance Media
All Rights Reserved

 RSS Feed


